How to constrain a UI component to the edges of a UIViewController

Oscar de la Hera Gomez
A flower that represents Xcode with the text "Constrain UI Components to Edges in a Storyboard" beneath it.

A step by step guide on constraining a UI component to the edges of a UIViewController and not the safe area using XCode.

Step One: Constrain the UI Component to the Safe Area

A screenshot of Xcode showing the launch screen storyboard. An image view has been selected and the constraint menu is open. We have highlighted how if you click the constraint icon next to an edge it turns red and how you can change the value using the input next to the relevant constraint. We have also highlighted that a button becomes active at the bottom of the constraint menu that allows you to apply the constraints.

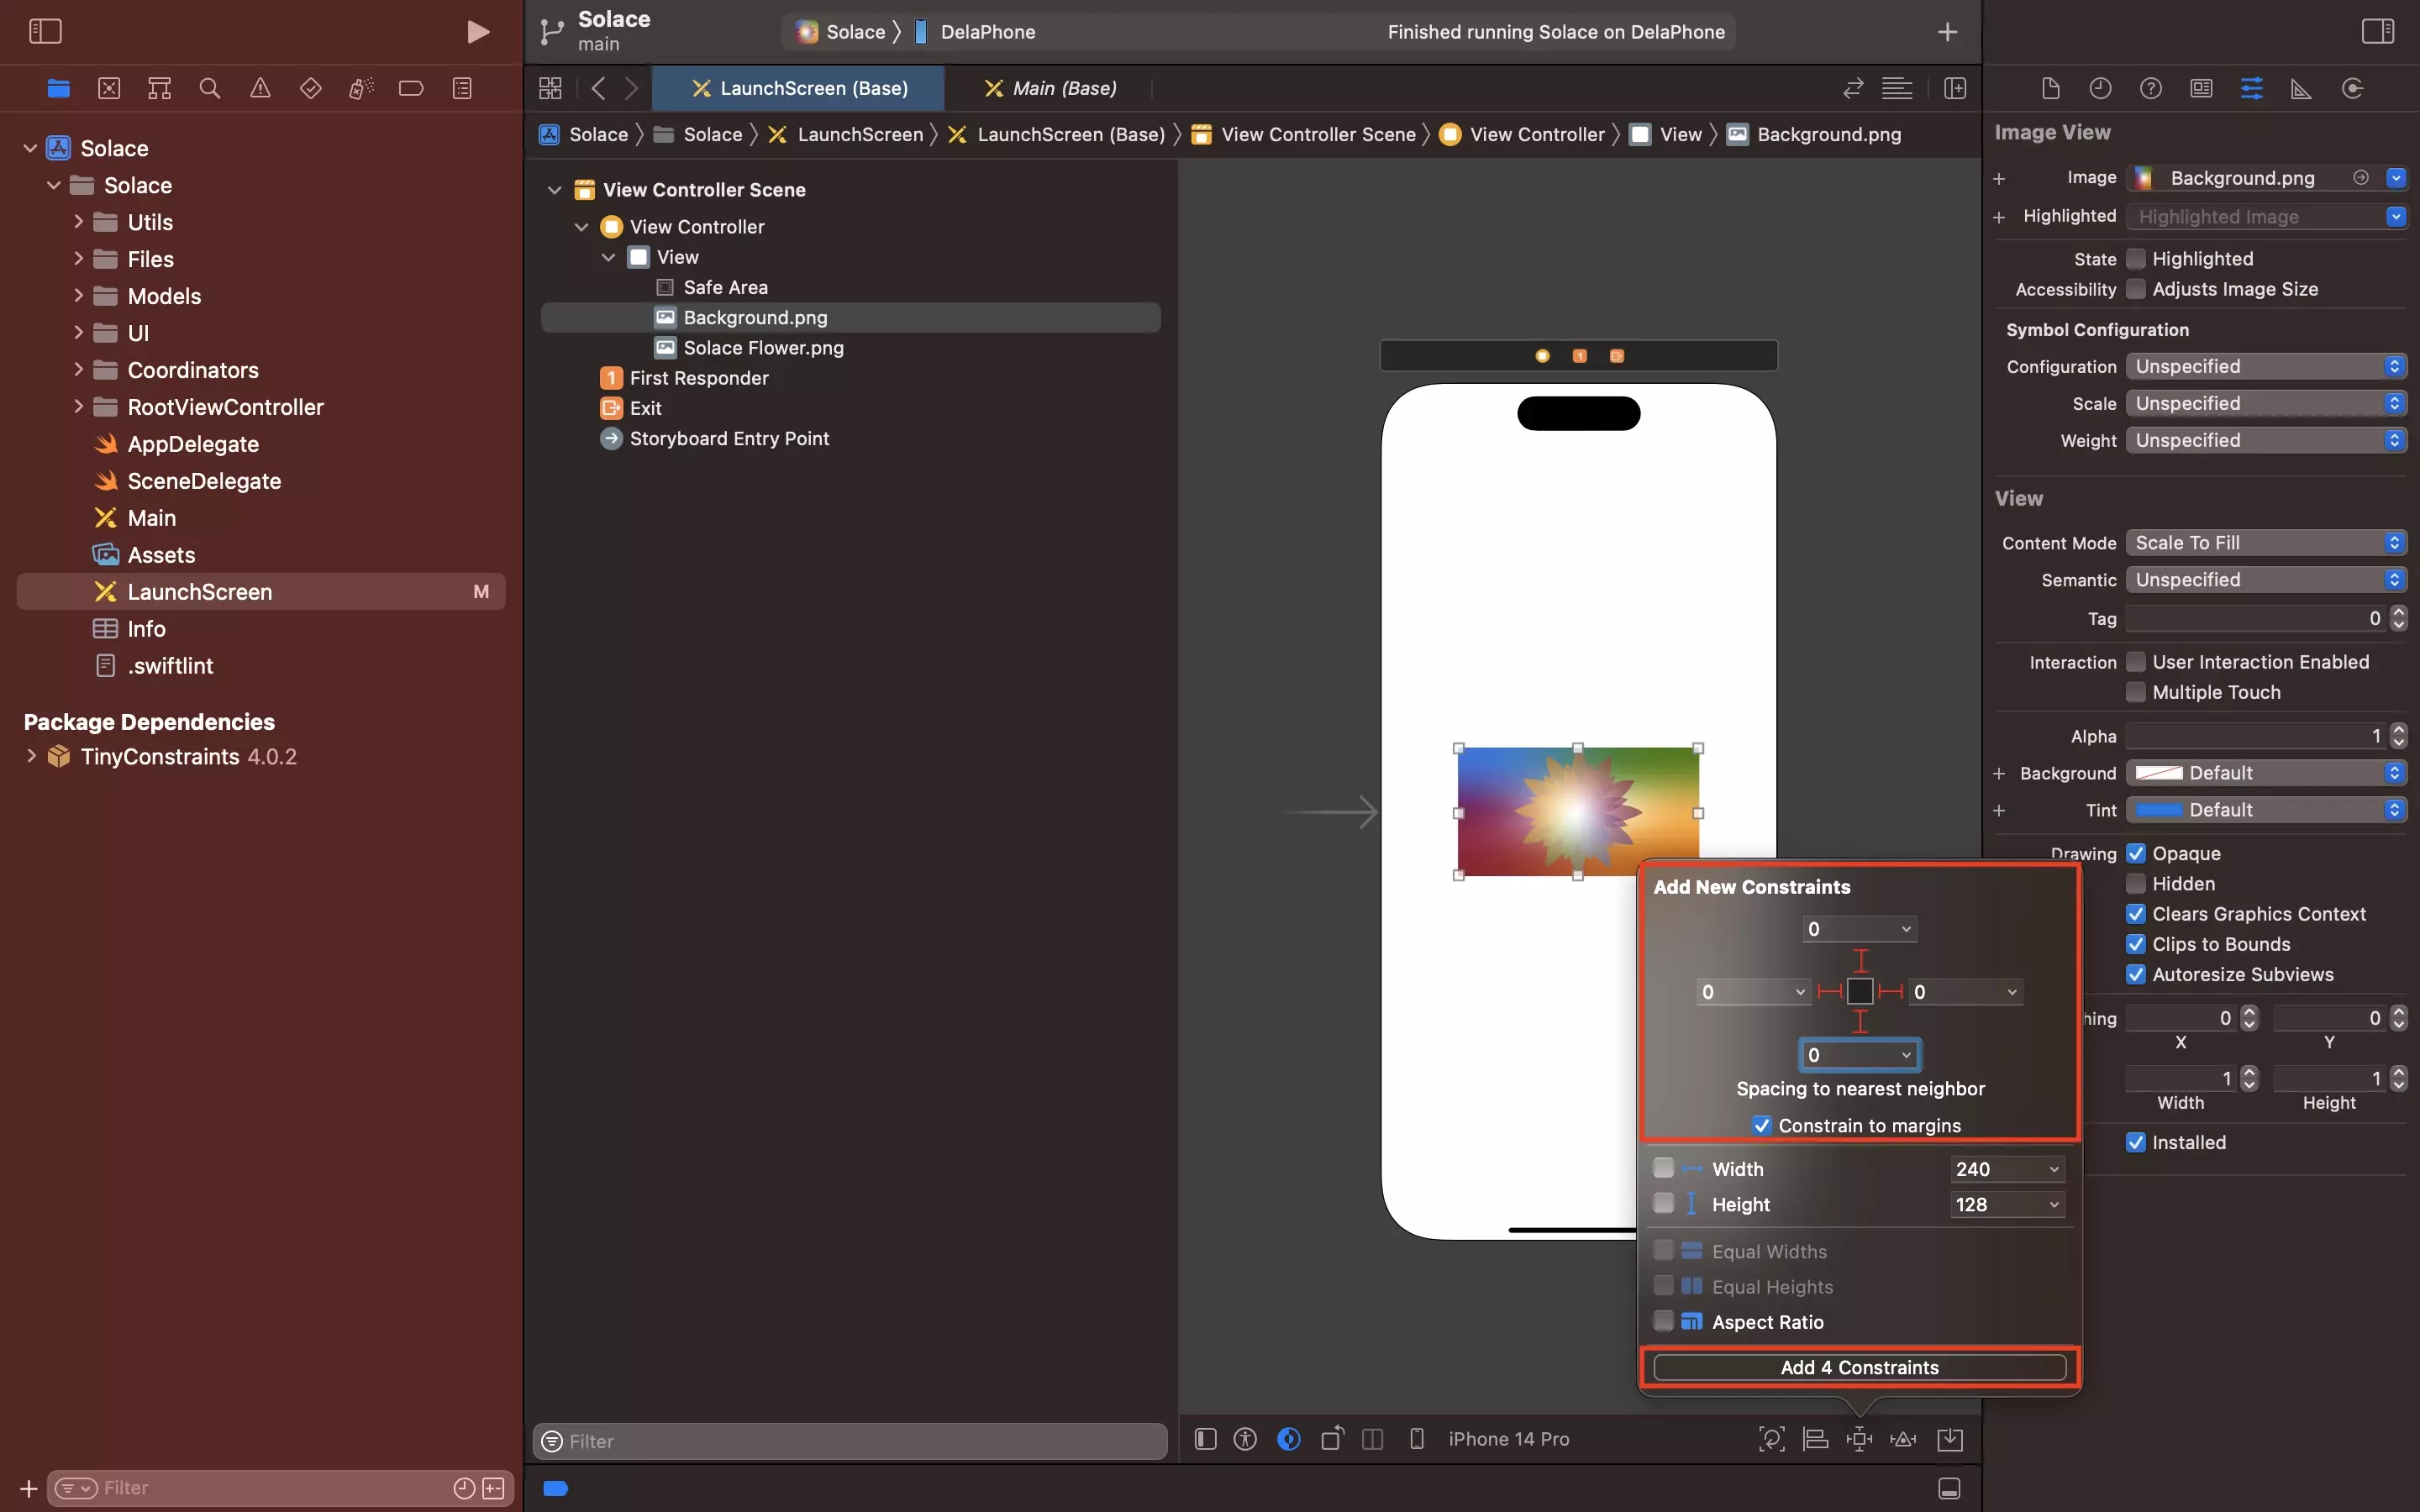
Add a UI component to a view and constrain it to the safe area of the UIViewController.

Step Two: Change the items from Safe Area to Superview


<p>A screenshot of Xcode showing the launch screen storyboard. We have highlighted all the constraints on the storyboard inspector. One of them is selected. On the right menu side bar we have highlighted how we have selected the size inspector and that the second item is set to Safe Area. If you press the dropdown next to the second item, you can change the constraint to be set to the "Superview" instead of the "Safe Area" this will constrain the view to the true edge.</p>
<p></p>

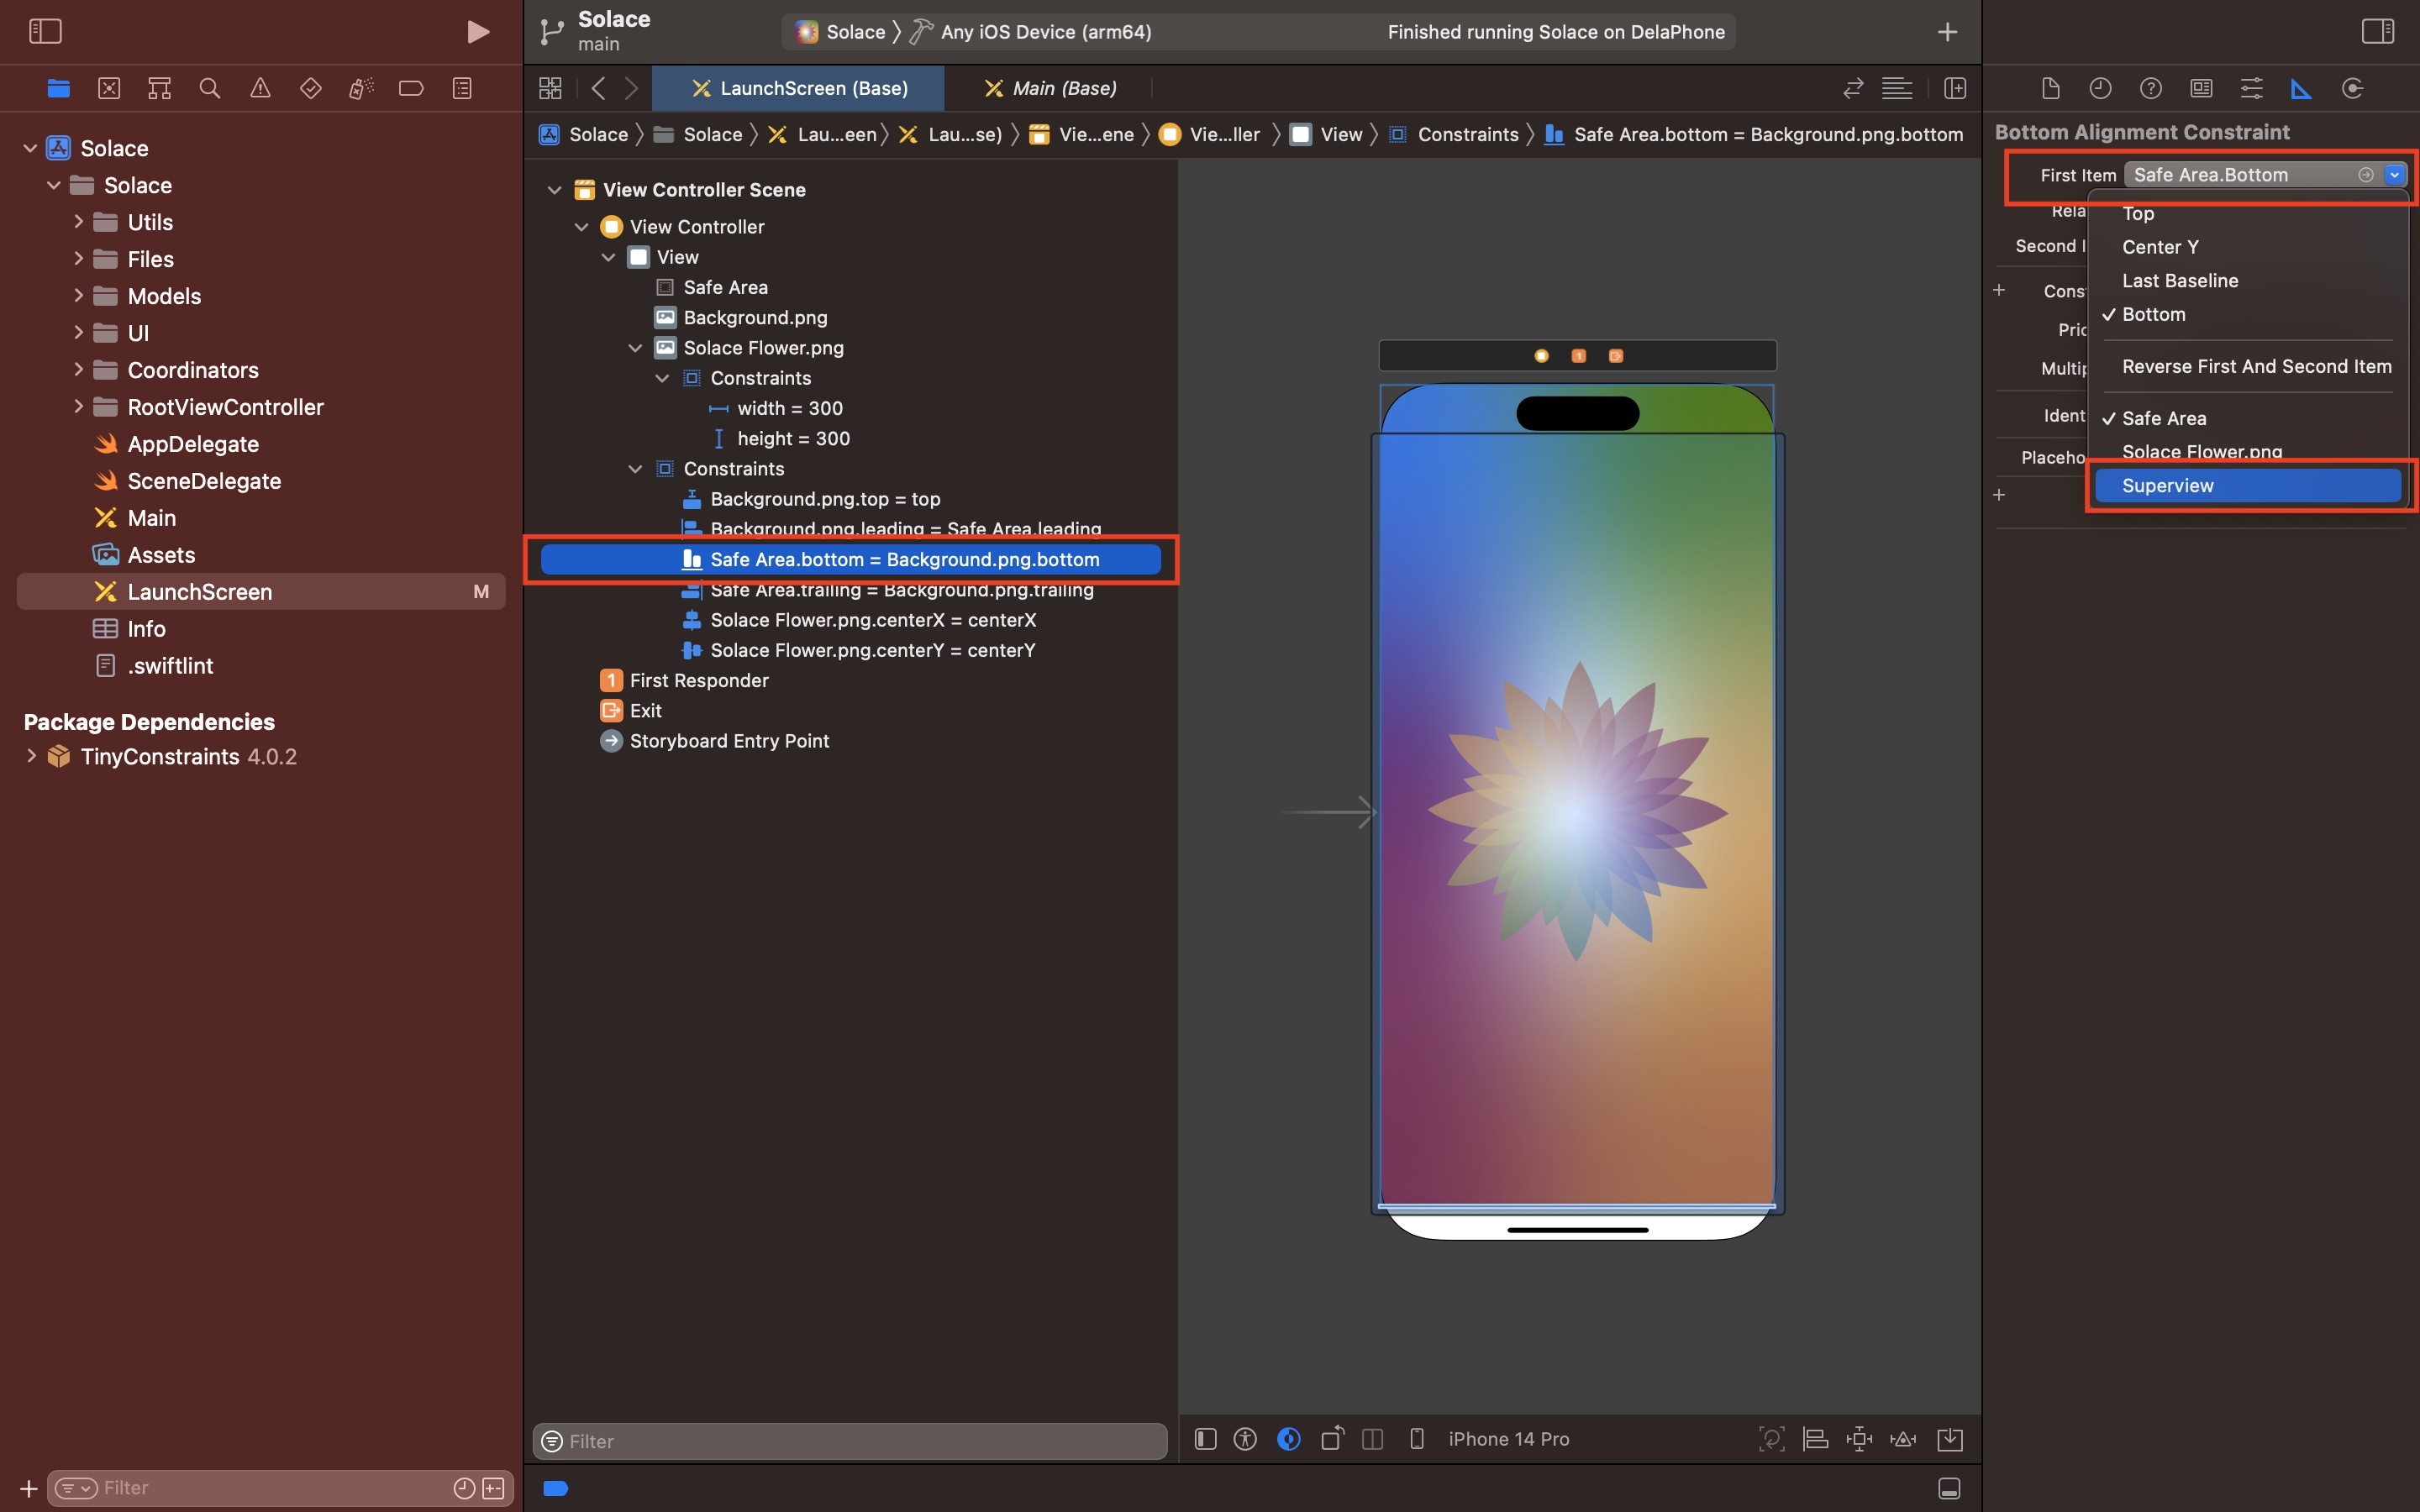
One by one, select the constraints that are constrained to the Safe Area, and using the right menu side bar's size inspector change the item from Safe Area to Superview.

Please note that the item may be the first item or the second item, what's important is that it is set to the superview and not the safe area.

A screenshot of Xcode showing the launch screen storyboard. One of the constraints in the storyboard inspector is selected. On the right menu side bar the size inspector is selected and we have highlighted how we have set the constant to 0. After changing from Safe Area to Superview, this constant will reflect the value of the safe area inset for that constraint, which will not be 0. To make sure that the constraint touches the edge, set it to 0.

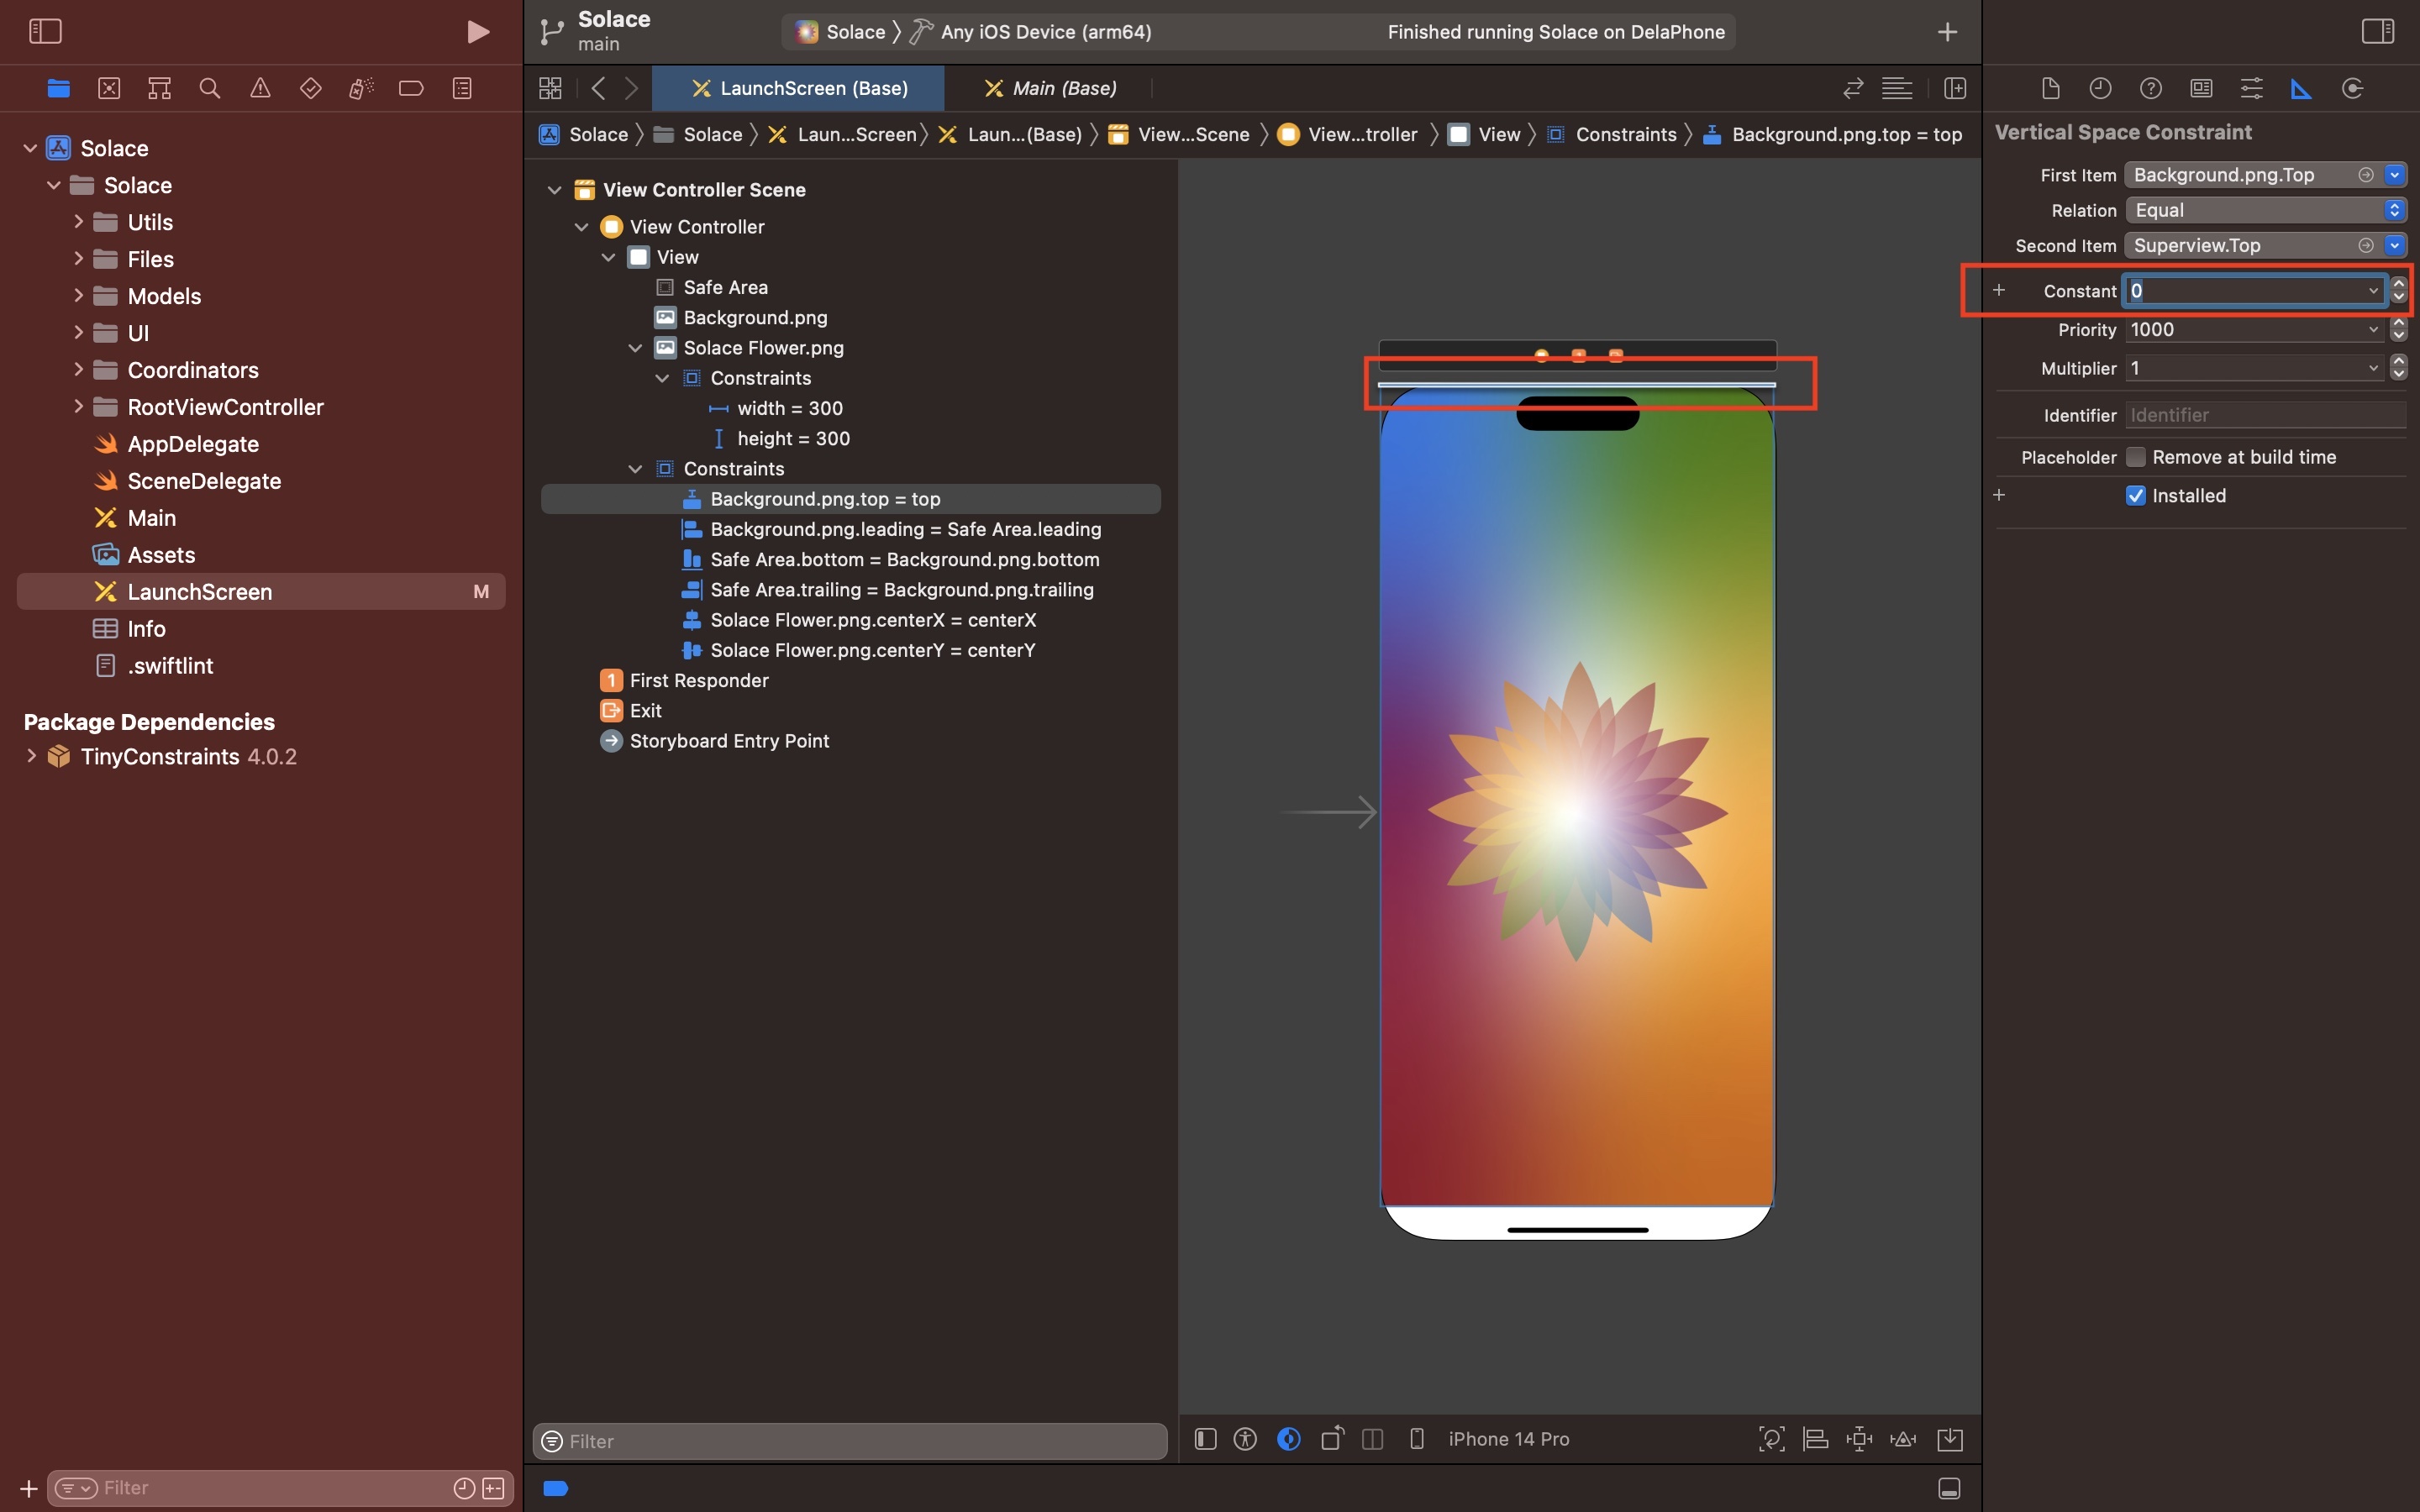
Make sure that you set the constant to 0 after changing the item from Safe Area to Superview.

A screenshot of Xcode showing the launch screen storyboard. We have highlighted all the constraints on the storyboard inspector. One of the constraints is selected. On the right menu side bar we have highlighted how we have selected the size inspector and that the first item is set to Safe Area. If you press the dropdown next to the first item, you can change the constraint to be set to the "Superview" instead of the "Safe Area" this will constrain the view to the true edge.

The example above shows how to adapt the constraint if the Safe Area is the First Item.

Remember to set the constant to 0 after changing the item.


<p>A screenshot of Xcode showing the launch screen storyboard. We have highlighted all the constraints on the storyboard inspector. The view controller on the screen shows how the "background" now touches all the edges of the view, and not the safe area insets.</p>
<p></p>

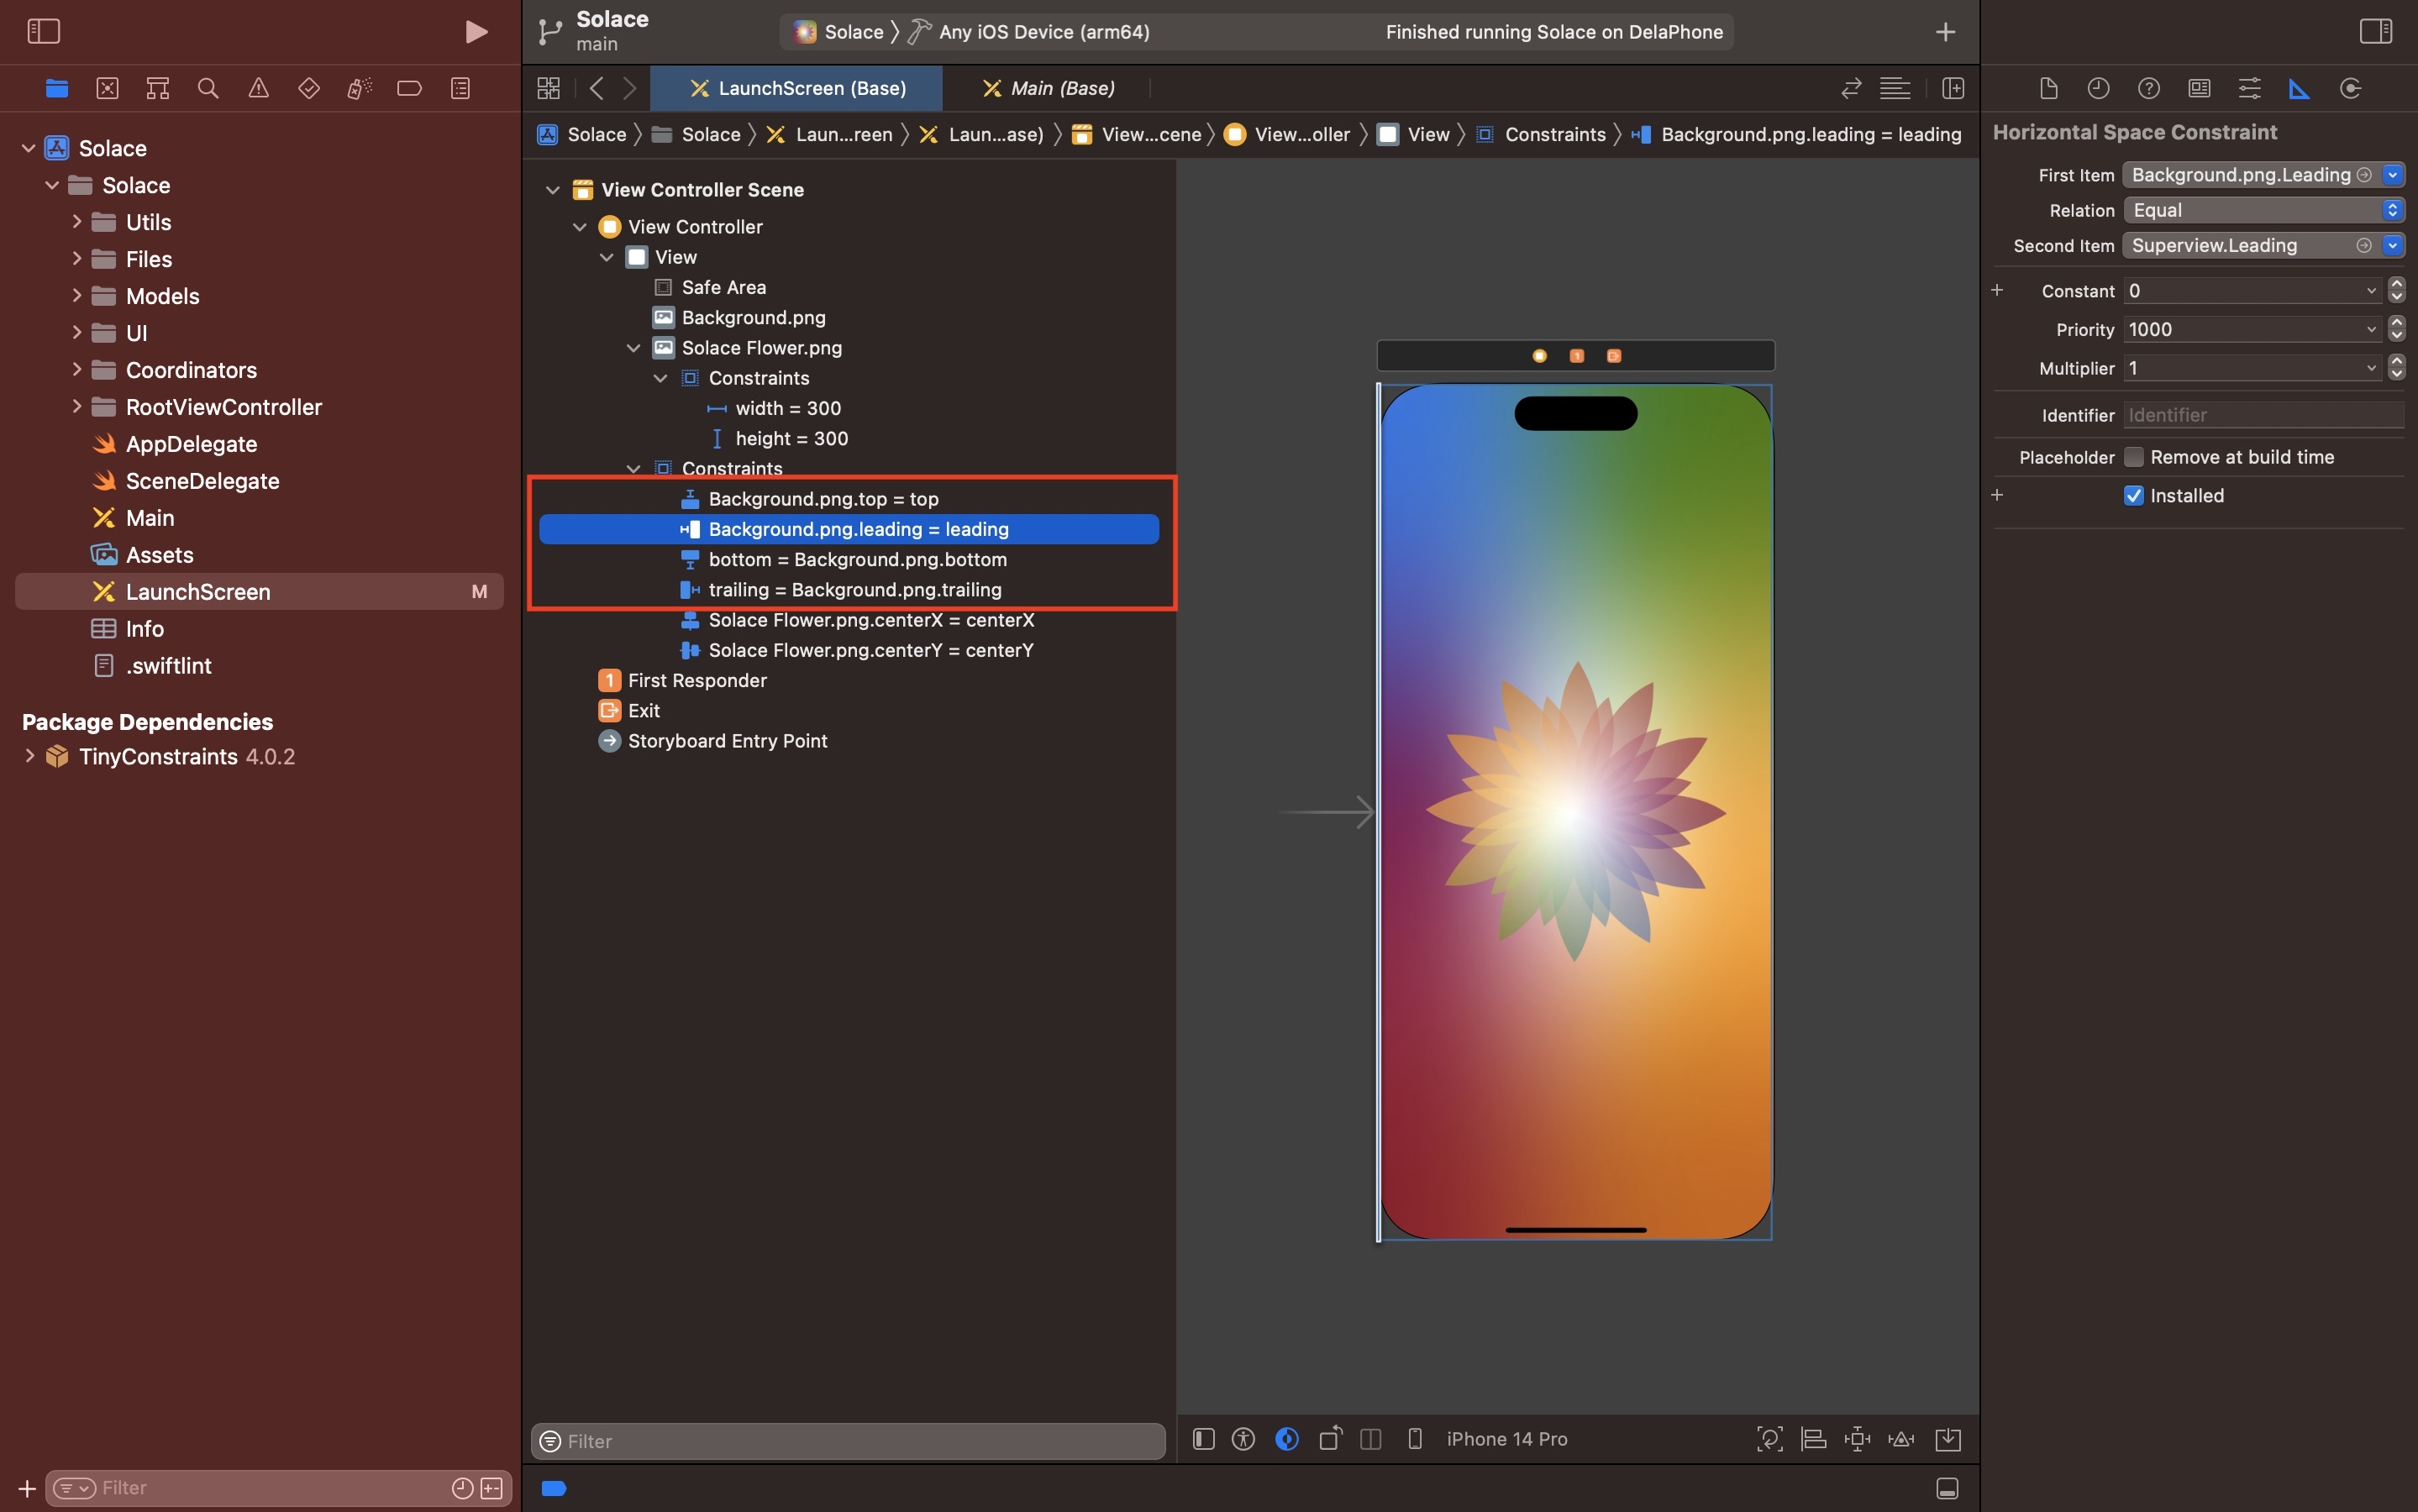
Once complete, the storyboard and constraints should look similar to that above.

Any Questions?

We are actively looking for feedback on how to improve this resource. Please send us a note to inquiries@delasign.com with any thoughts or feedback you may have.
delasign logo

Book a Free Consultation.

An icon of an email.

Click here to email us.

Fill in the details below to book a free consultation or to let us know about something else. Whatever it is, we are here to help.

How can we help you ?

Contact Details