
How to add a local image to a view in Swift

A step by step tutorial on adding a local image from your assets.xcassets to a view in Swift (iOS). Github repository included.
The following tutorial builds on our Open Source Swift and demonstrates how to add a local image to a UIImageView. This tutorial starts on the main branch and the changes are available on the tutorials/local-image branch of the repository below.
Clone the repo's main branch, before starting the tutorial.
git clone git@github.com:delasign/swift-starter-project.git
Please note this tutorial uses the TinyConstraints Swift package, which we added using the Swift Package Manager.
Step One: Declare your variable
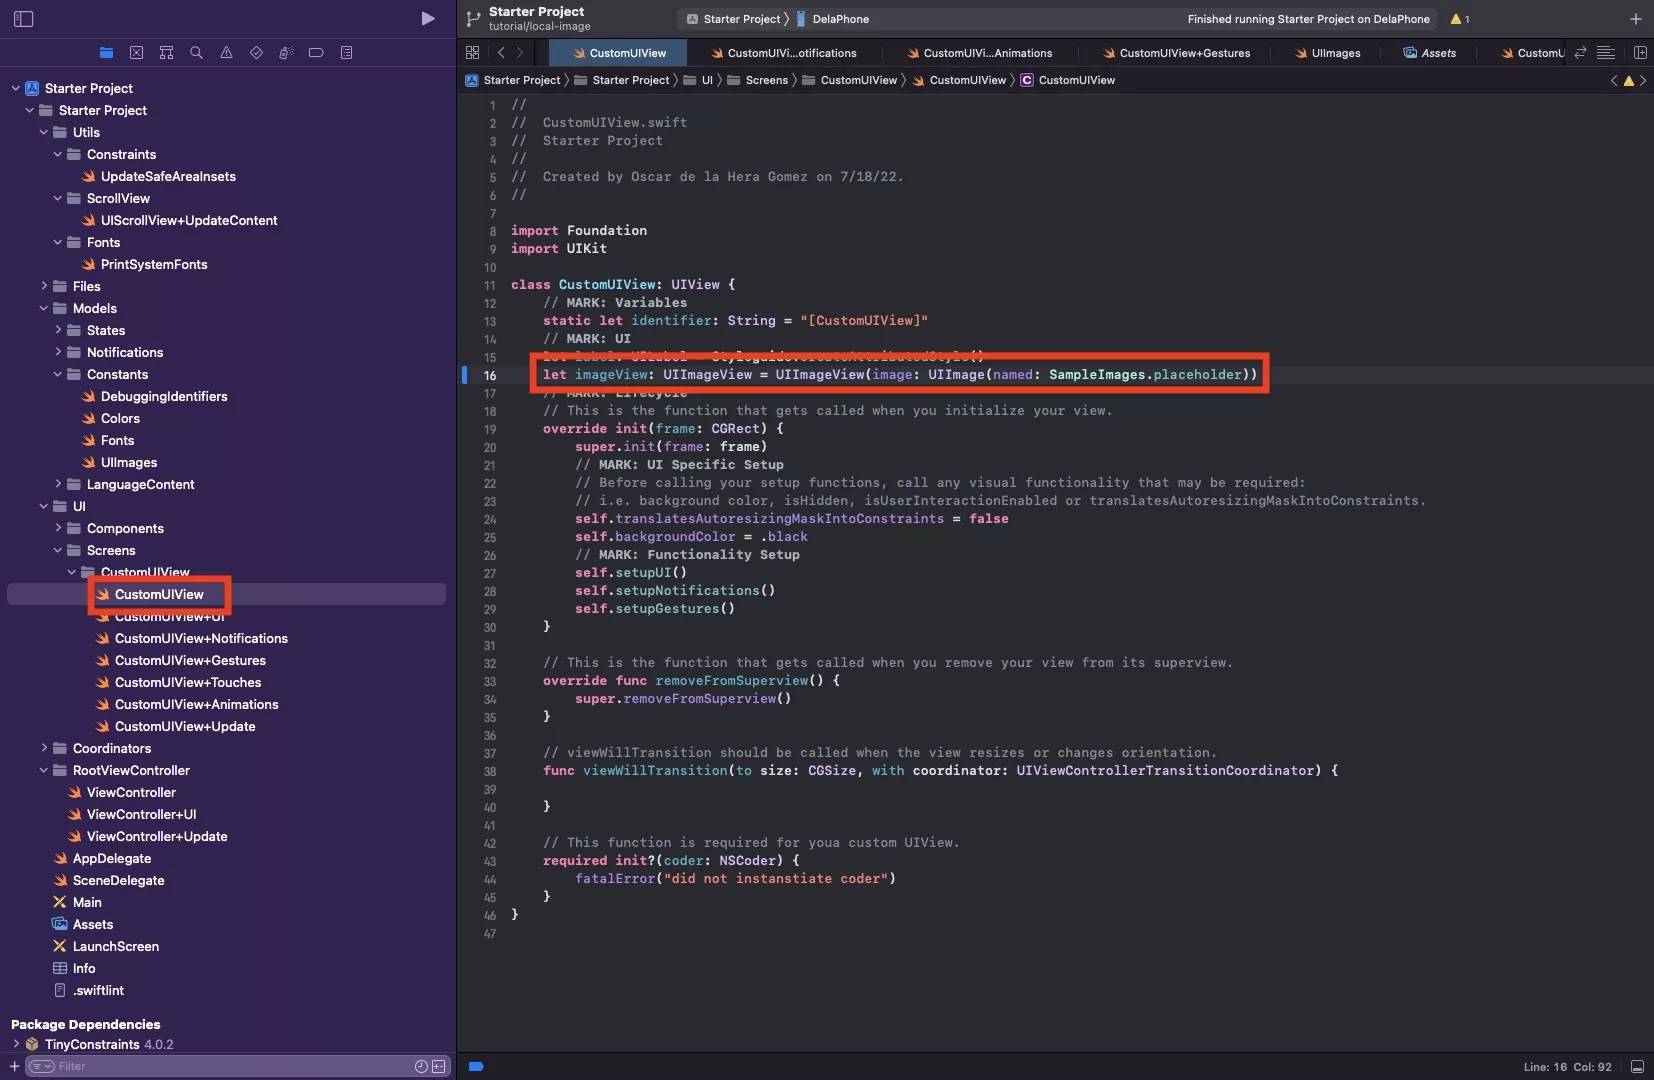
In CustomUIView.swift, declare your UIImageView and set the image to your local image.
let imageView: UIImageView = UIImageView(image: UIImage(named: SampleImages.placeholder))
Step Two: Setup your ImageView
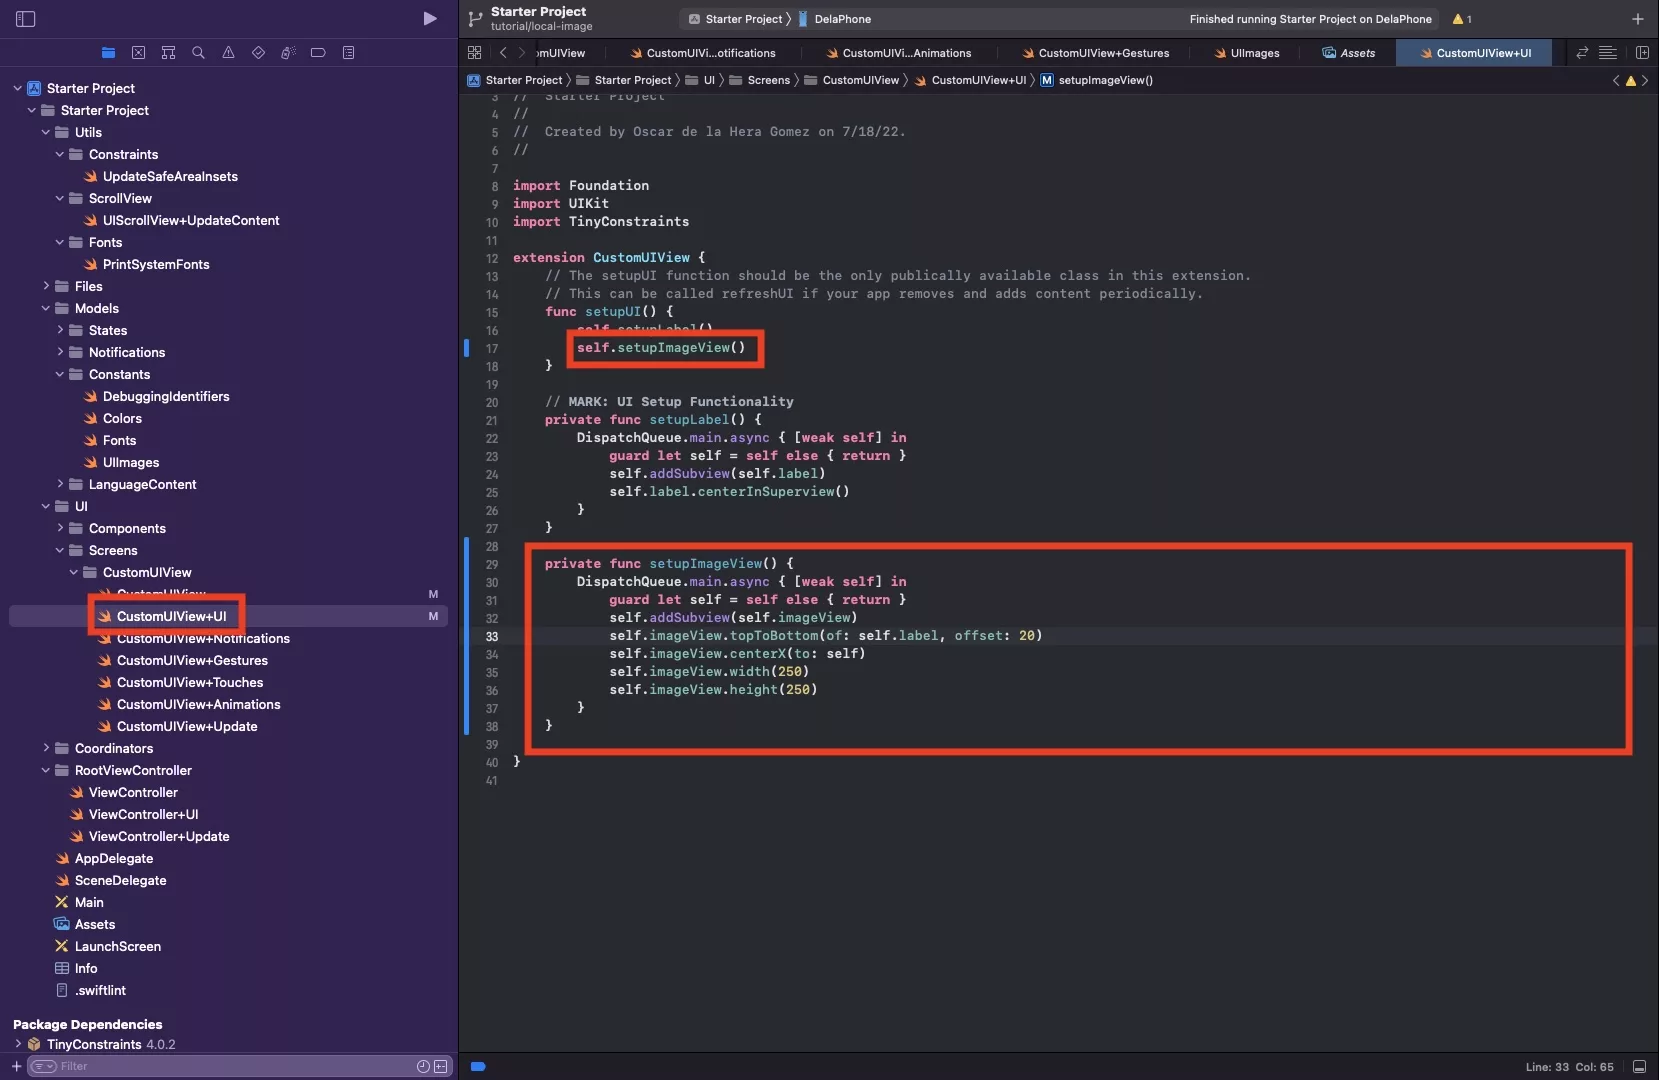
In CustomUIView+UI.swift setup your image view. Sample code below.
Here we have set the imageView to:
- Sit below the label, at an offset of 20 pixels.
- Center itself horizontally on the view
- Have a width and a height of 250 pixels.
Step Three: Verify
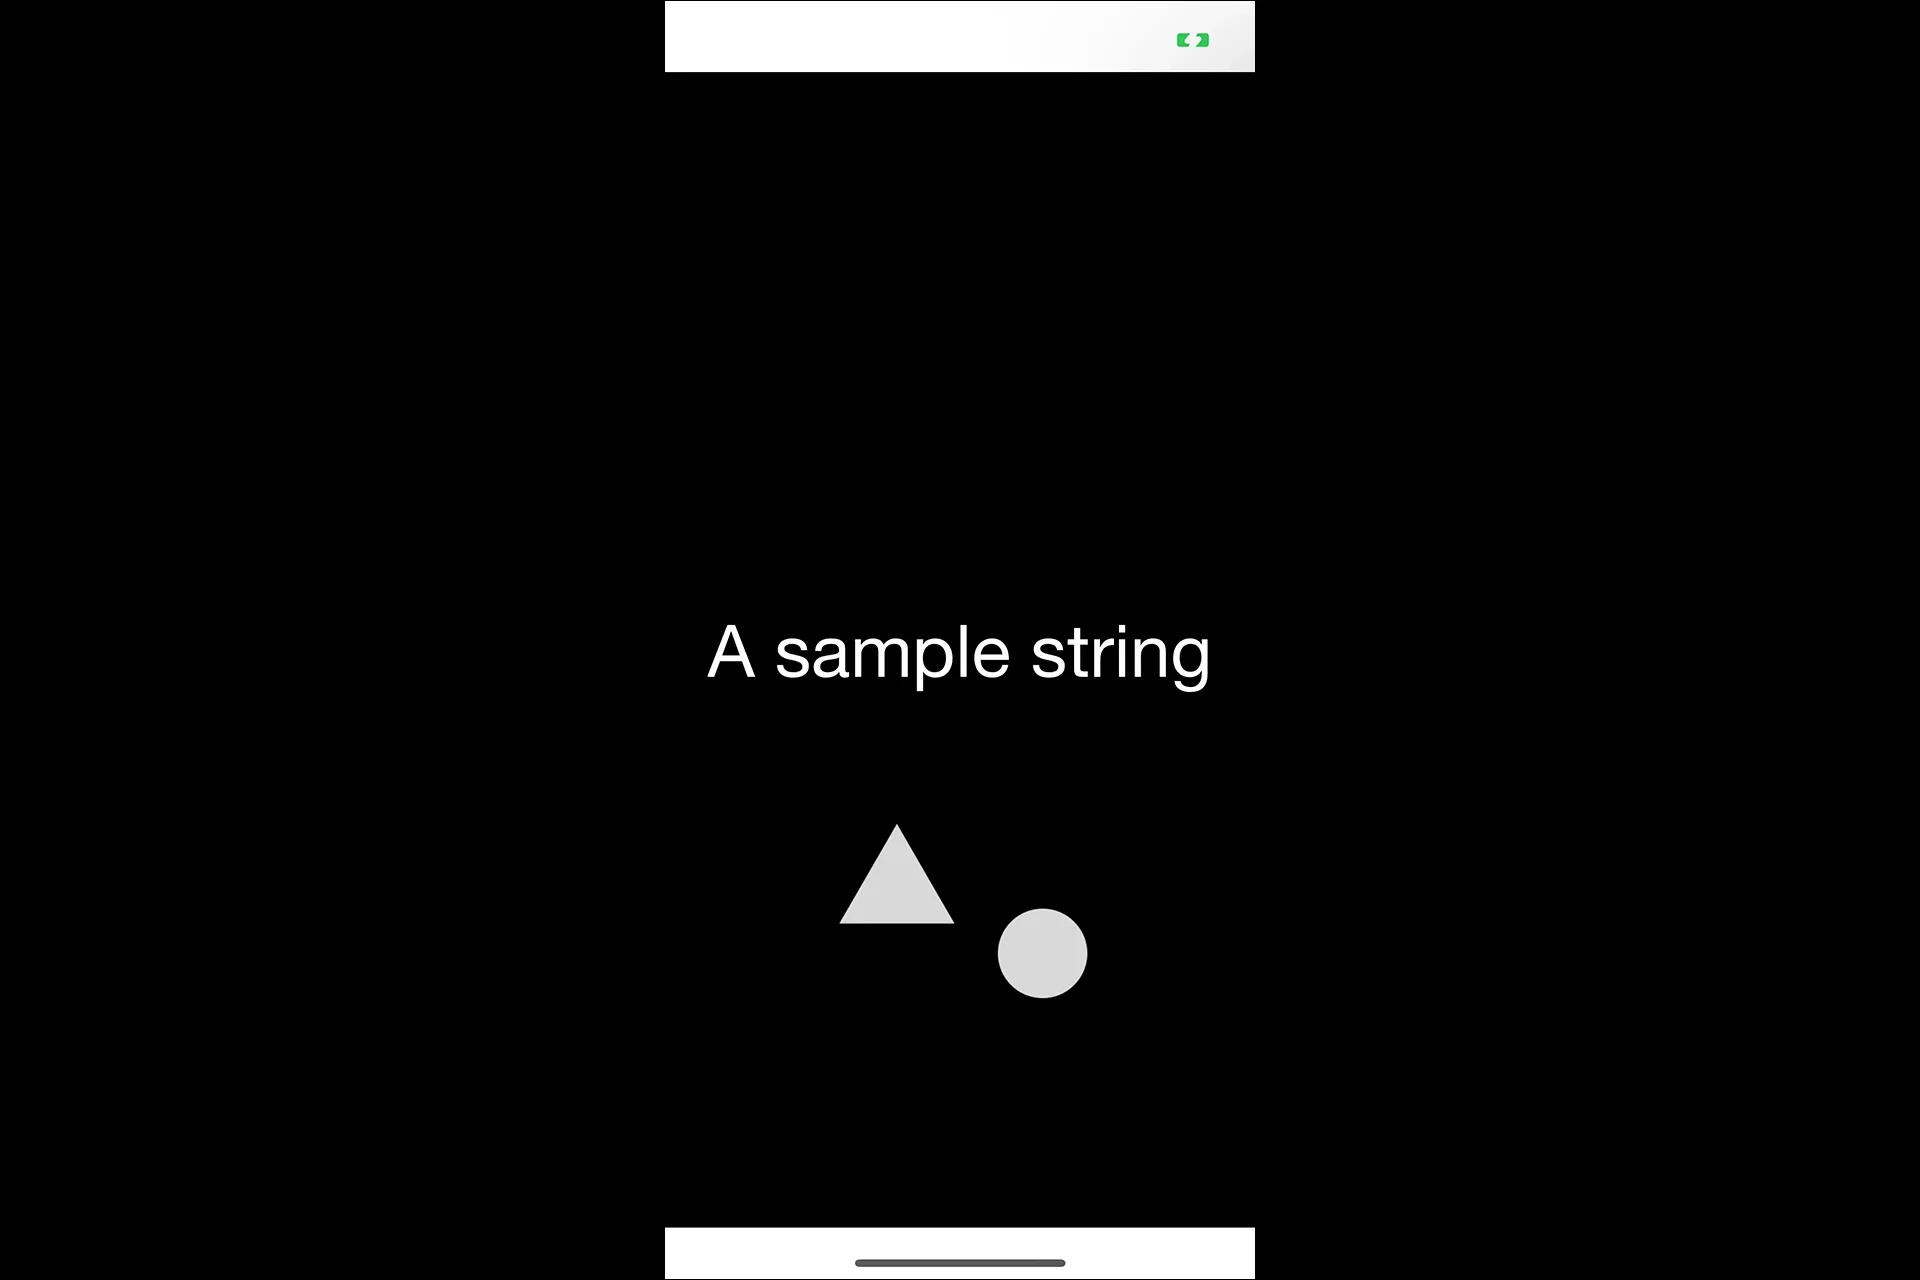
Run your app to verify that the image appears.
Any Questions
We are actively looking for feedback on how to improve this resource. Please send us a note to inquiries@delasign.com with any thoughts or feedback you may have.