How to add and use images as files instead of xcassets in XCode

Oscar de la Hera Gomez
Two flowers that represent Swift and XCode side by side. Beneath them sits the text “Image Files”.

Drag and drop the files into the project, set the targets and click finish. Use the images in the same way you use xcassets.

Step One: Drag and Drop the Files

A screenshot showing a finder window next to an XCode project. We have highlighted how you can drag and drop assets from the finder window into Xcode.

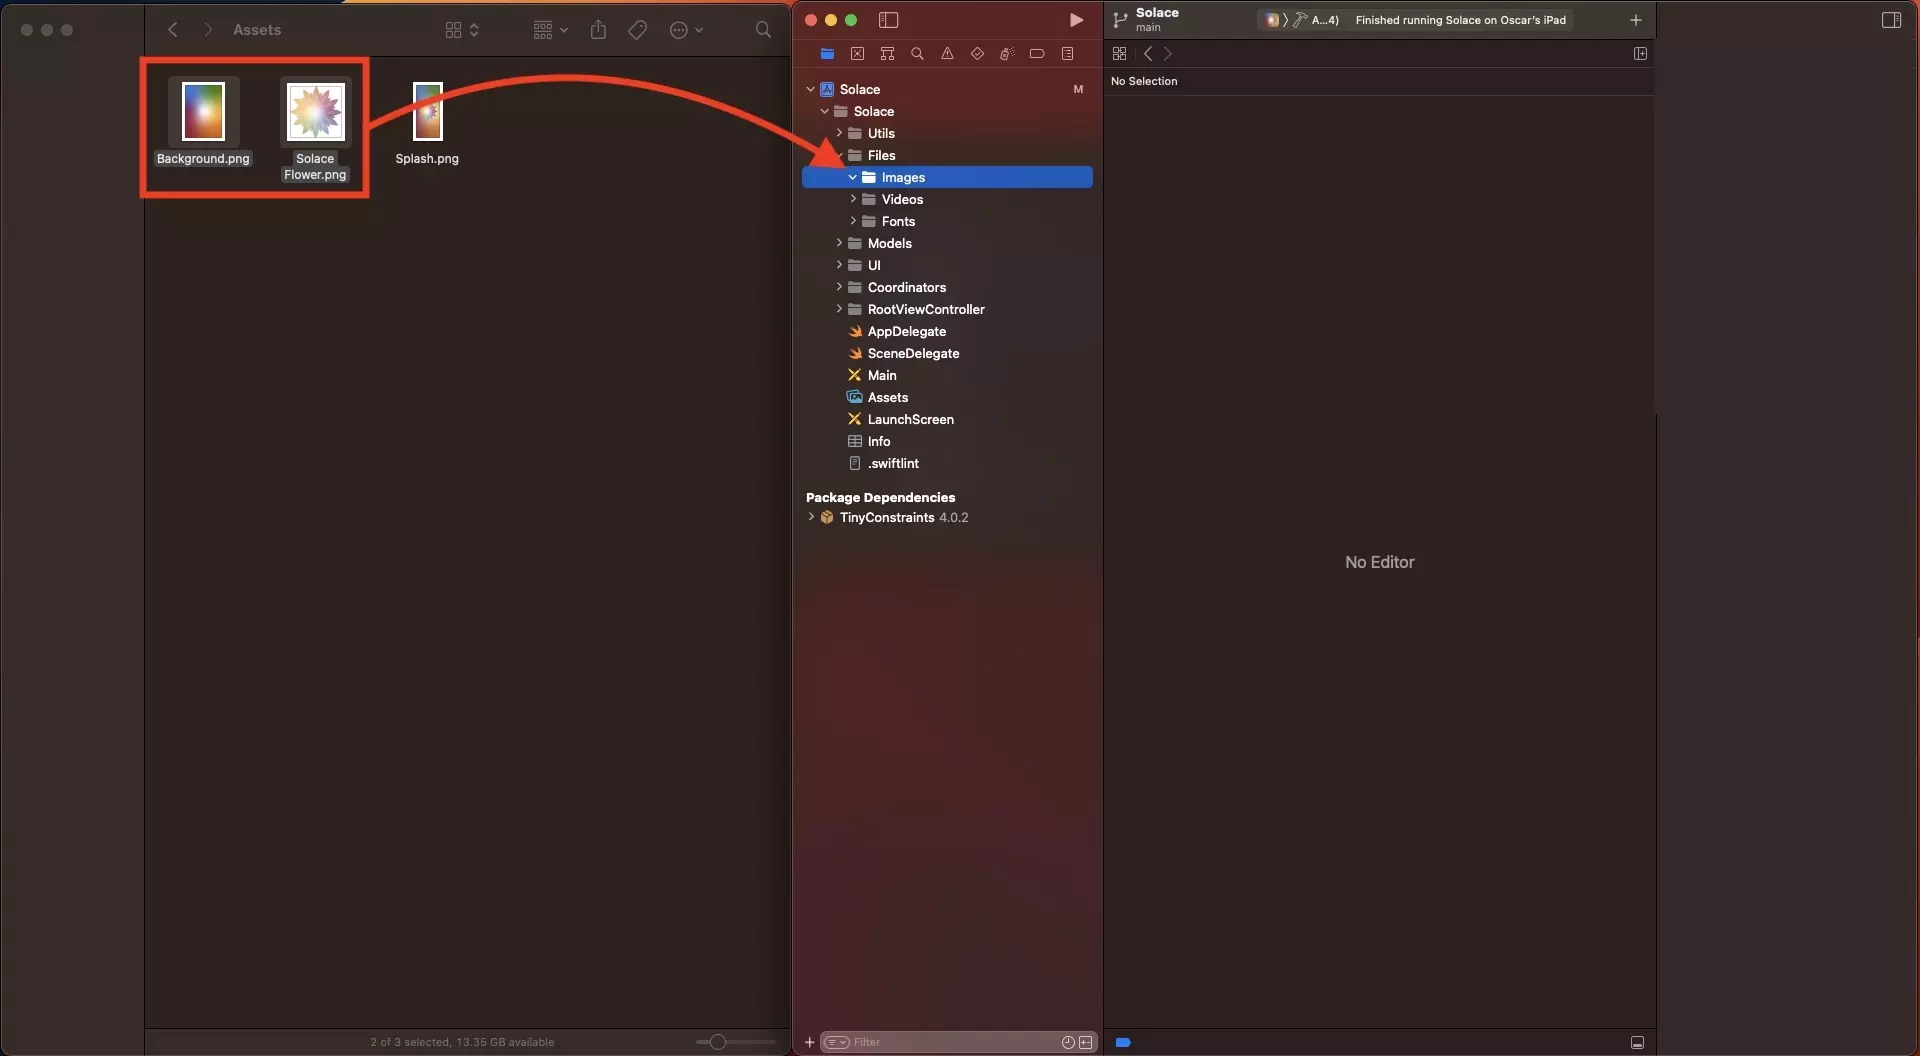
Drag and drop the images into the project.

We recommend that you hold all images under a Images folder within Files.

Step Two: Add to Project

This screenshot highlights the pop up that appears in Xcode when you drag and drop images into a project. We have highlighted how you need to check off "copy items if needed" and to ensure that you have checked off the targets that use the images.

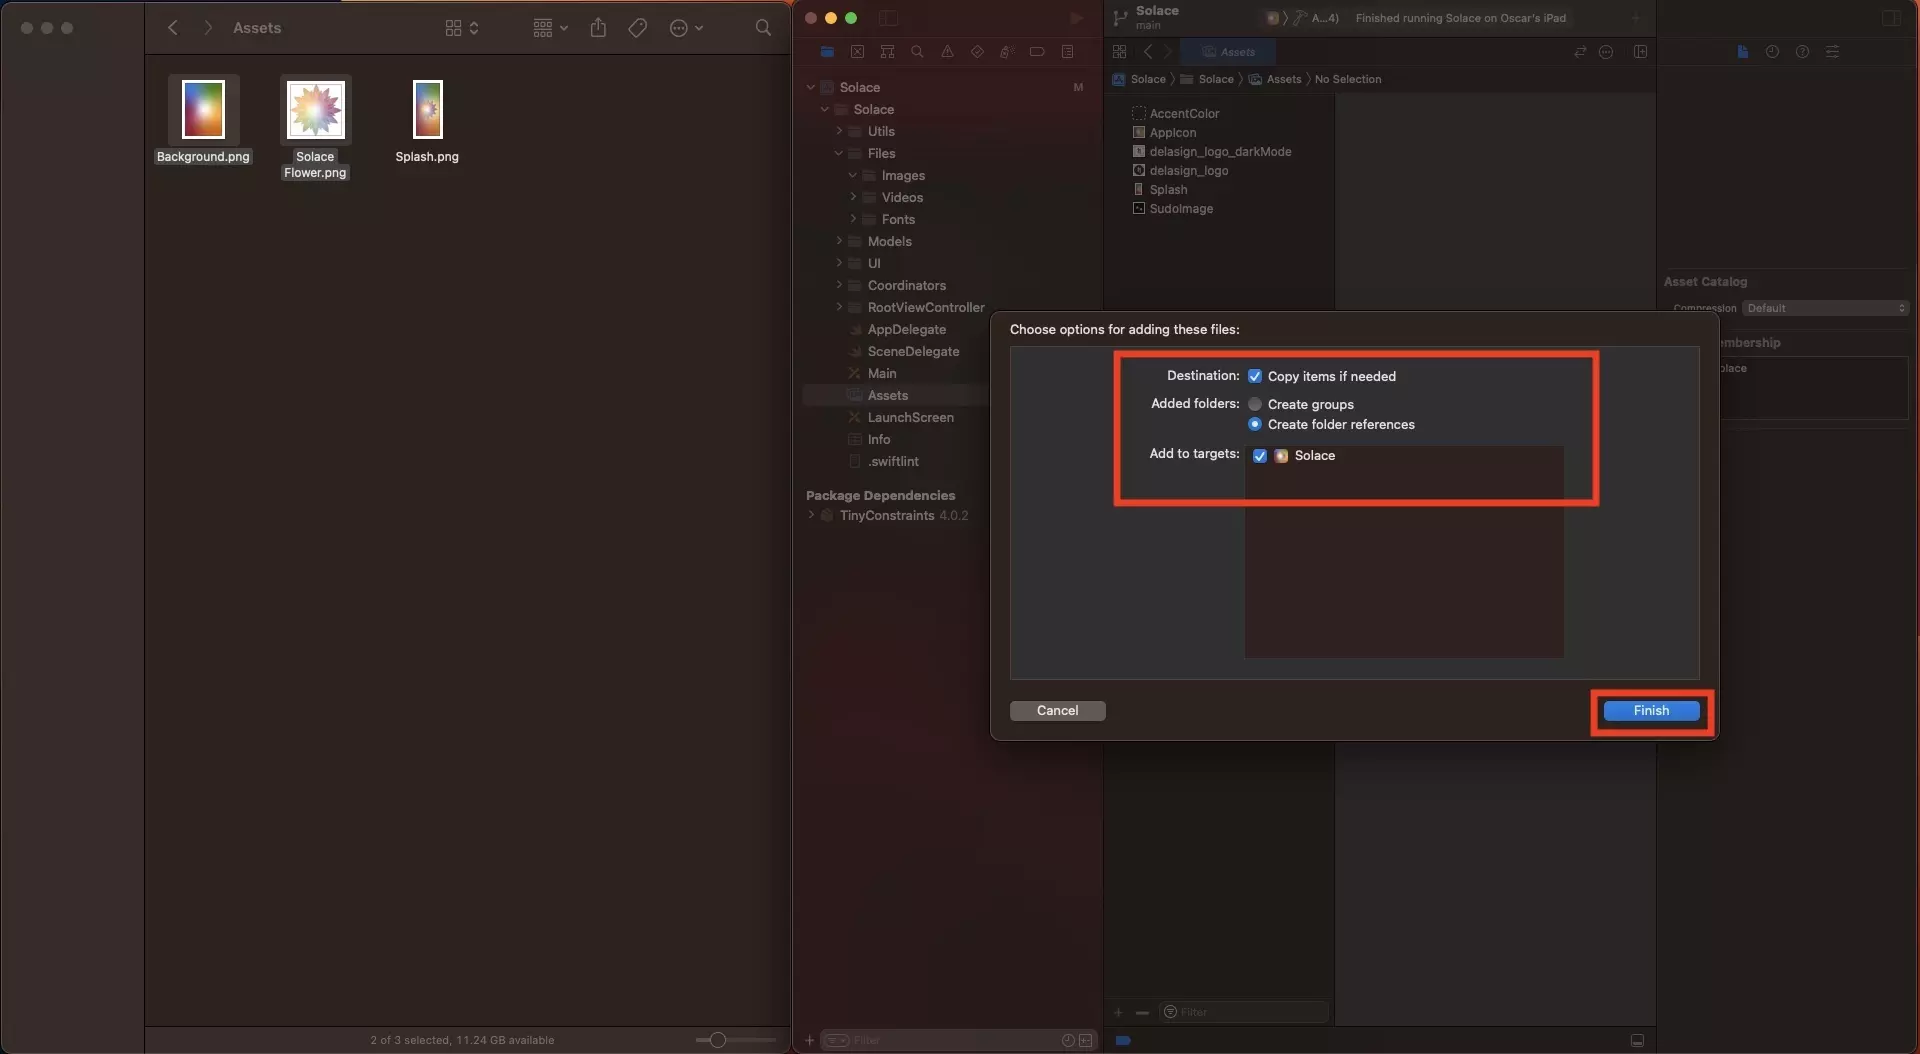
In the pop up that appears, make sure that Copy items if needed is checked off and that you have checked off the relevant targets for the project that will use these images.

Step Three: Use

A screenshot of Xcode showing swift code that demonstrates that you can apply an image file the same way that you use xcassets - by using the name within a UIImage.

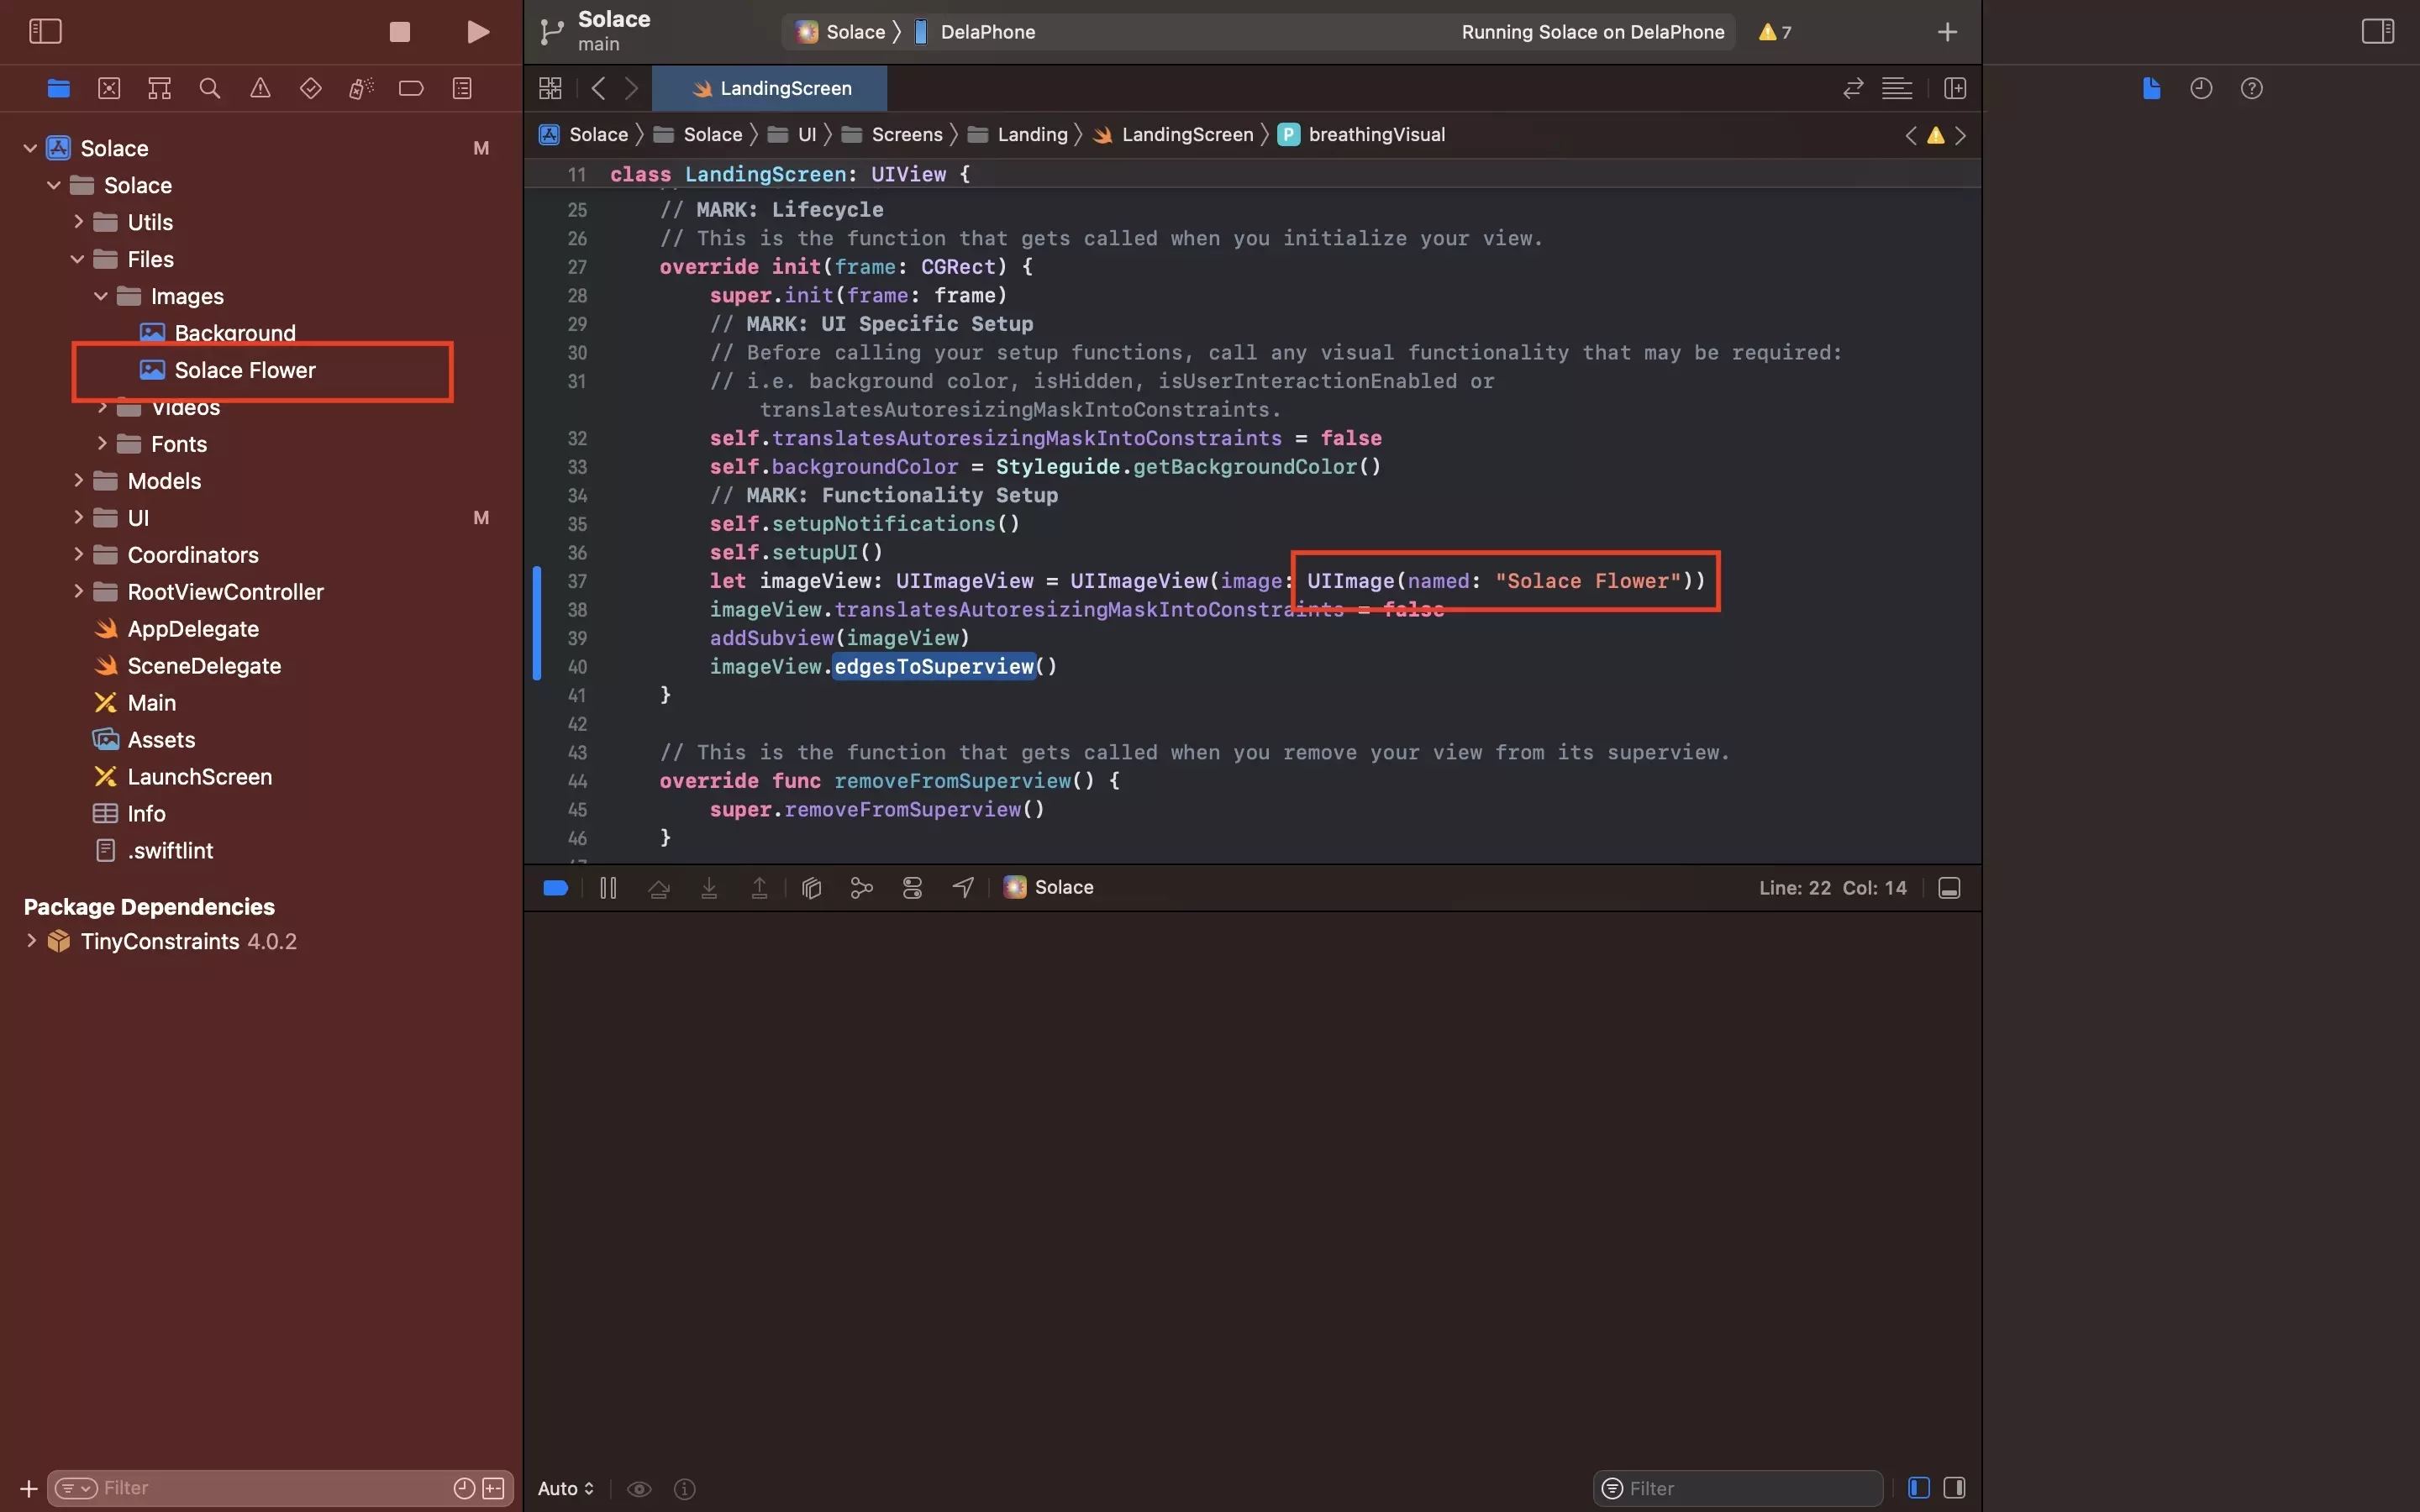
Local image files work the same was as xcassets, and can be added to an image view by using the name of the file.

We recommend that you add the names to a struct that holds all the references. To learn how to do this or how to add an image to a view, follow the tutorials below.

Any Questions?

We are actively looking for feedback on how to improve this resource. Please send us a note to inquiries@delasign.com with any thoughts or feedback you may have.
delasign logo

Book a Free Consultation.

An icon of an email.

Click here to email us.

Fill in the details below to book a free consultation or to let us know about something else. Whatever it is, we are here to help.

How can we help you ?

Contact Details